Using vmagent with vmauth and OAuth authentication Available from v1.138.0 enables secure metric ingestion in multi-tenant environments, where vmagent authenticates to vmauth using JWT tokens issued by an external identity provider. These tokens include tenant information so that metrics are written to the correct tenant.
This guide walks through configuring vmagent to ingest metrics through vmauth with OIDC authorization enabled.
Prerequisites #
- Docker and docker compose must be installed.
- jq tool
- Add the
keycloakhost to the/etc/hostsfile pointing to127.0.0.1.
      # /etc/hosts

# Setup vmagent - Multi-Tenant remote write & OIDC
# https://docs.victoriametrics.com/guides/vmagent-openid-configuration/#prerequisites
127.0.0.1 keycloak
Identity provider #
The identity service must be able to issue JWT tokens with the following vm_access claim:
      {
  "exp": 1772019469,
  "vm_access": {
    "metrics_account_id": 0,
    "metrics_project_id": 0
  }
}
Note: if metrics_account_id or metrics_project_id are not specified, the default value 0 is used.
Some identity providers only support string-based claim values; vmauth supports those as well:
      {
   "exp": 1772019469,
   "vm_access": "{\"metrics_account_id\": 0, \"metrics_project_id\": 0}"
}
See details about all supported options in the vmauth documentation .
Setup Keycloak #
Keycloak is an open-source identity service that can issue JWT tokens.
Add the following section to your compose.yaml file to configure Keycloak:
      # compose.yaml
services:
  keycloak:
    image: quay.io/keycloak/keycloak:26.3
    command:
      - start-dev
      - --http-port=3001
    ports:
      - 127.0.0.1:3001:3001
    environment:
      KC_HOSTNAME_BACKCHANNEL_DYNAMIC: "true"
      KC_HOSTNAME: http://keycloak:3001/
      KC_BOOTSTRAP_ADMIN_USERNAME: admin
      KC_BOOTSTRAP_ADMIN_PASSWORD: change_me
    volumes:
      - keycloakdata:/opt/keycloak/data

volumes:
  keycloakdata: {}
Run docker compose up to start Keycloak.
Once Keycloak is available at http://keycloak:3001, follow the steps below to configure the OIDC client for vmagent:
Create client #
- Log in with admin credentials to your Keycloak instance
- Username:
admin - Password:
change_me
Go to
Clients->Create client.- Use
OpenID ConnectasClient Type. - Specify
vmagentasClient ID. - Click
Next.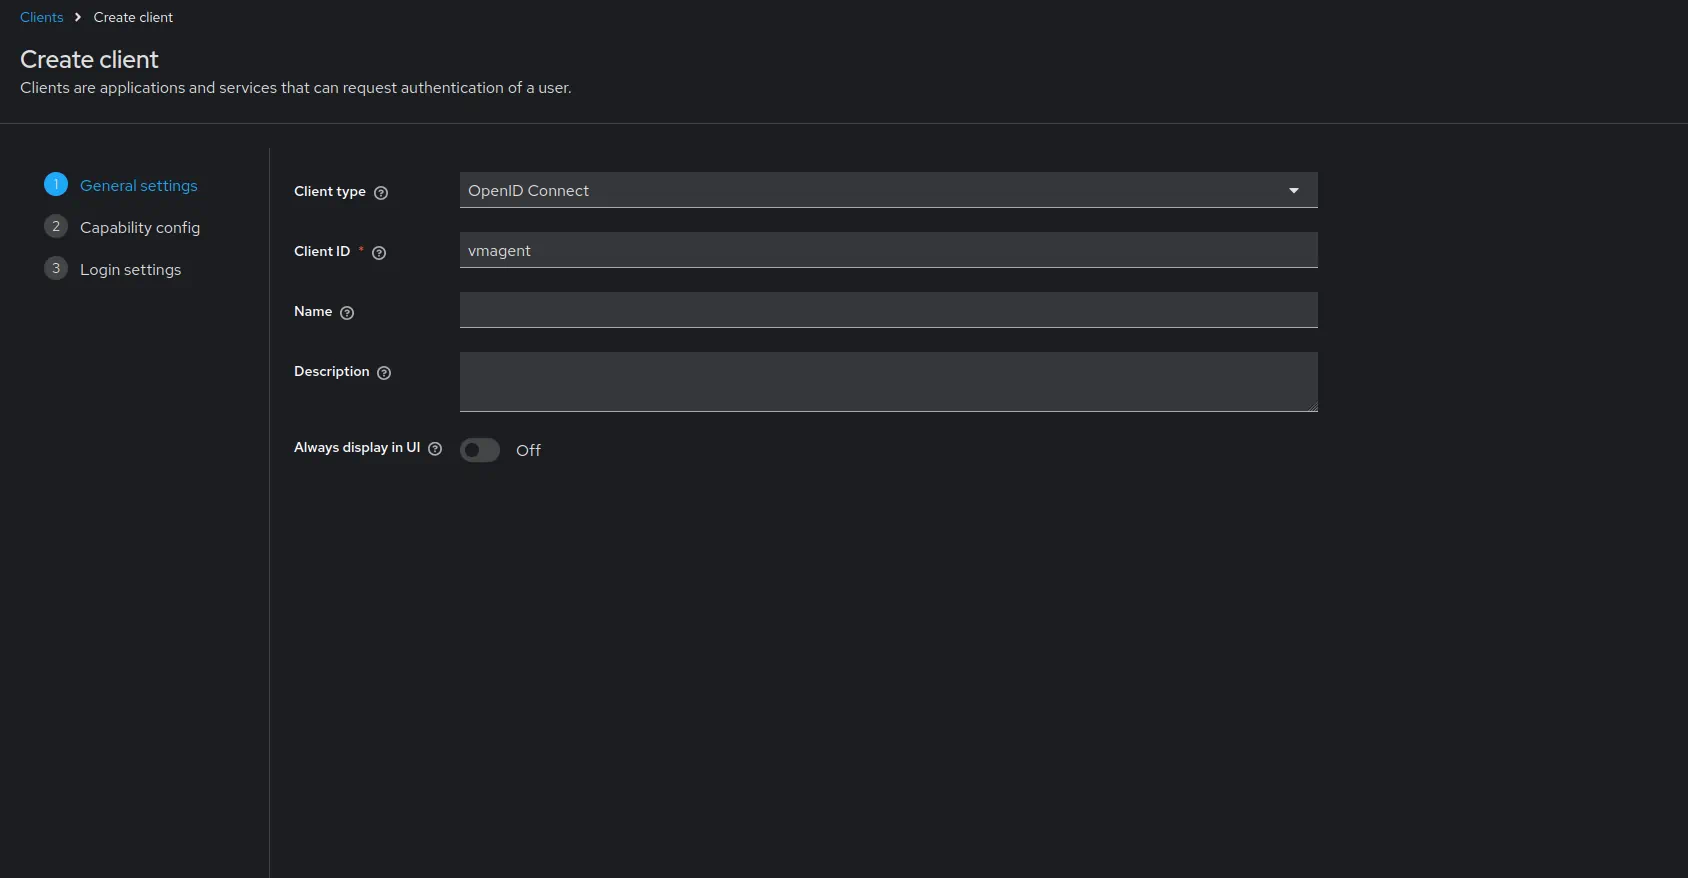
- Use
Enable
Client authentication.- Enable
Authorization.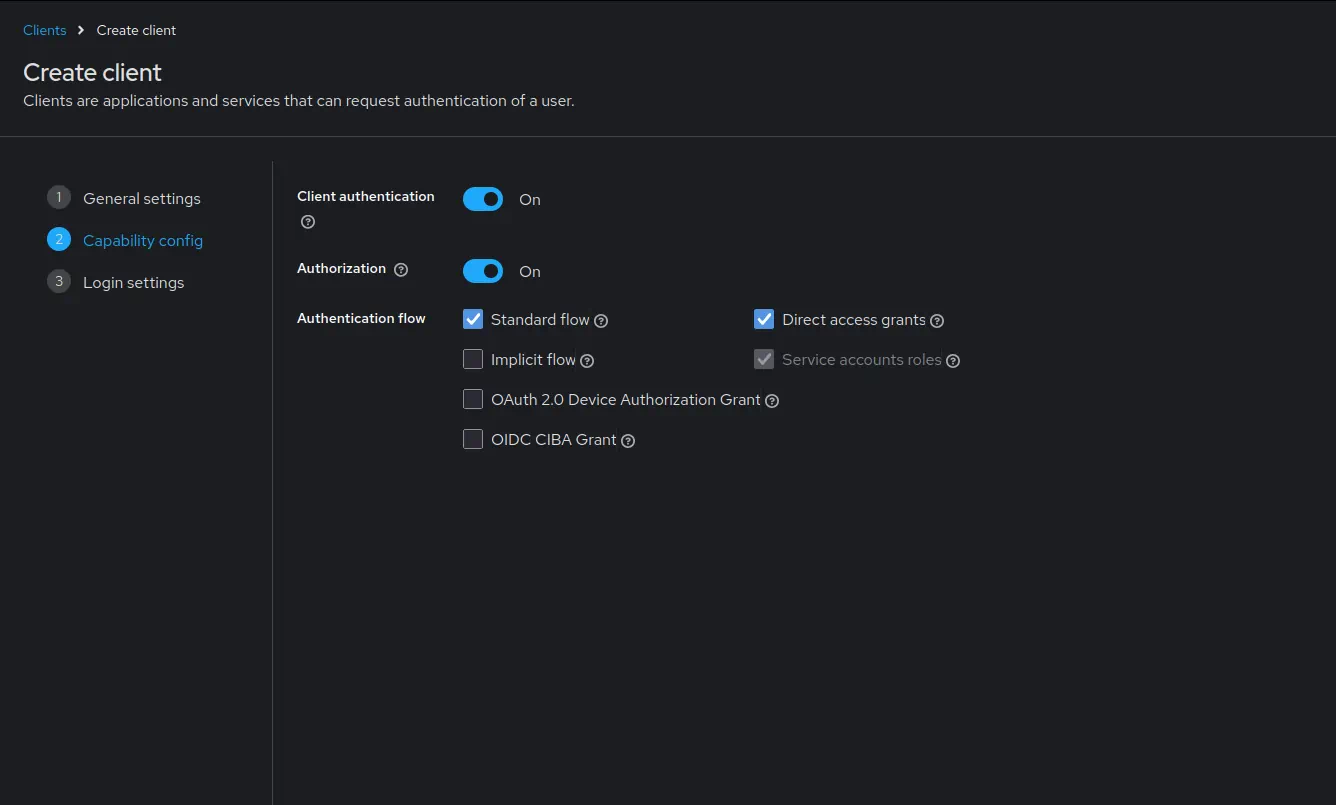
- Click
Next.
- Enable
Leave the URLs section empty as vmagent does not require any URLs.
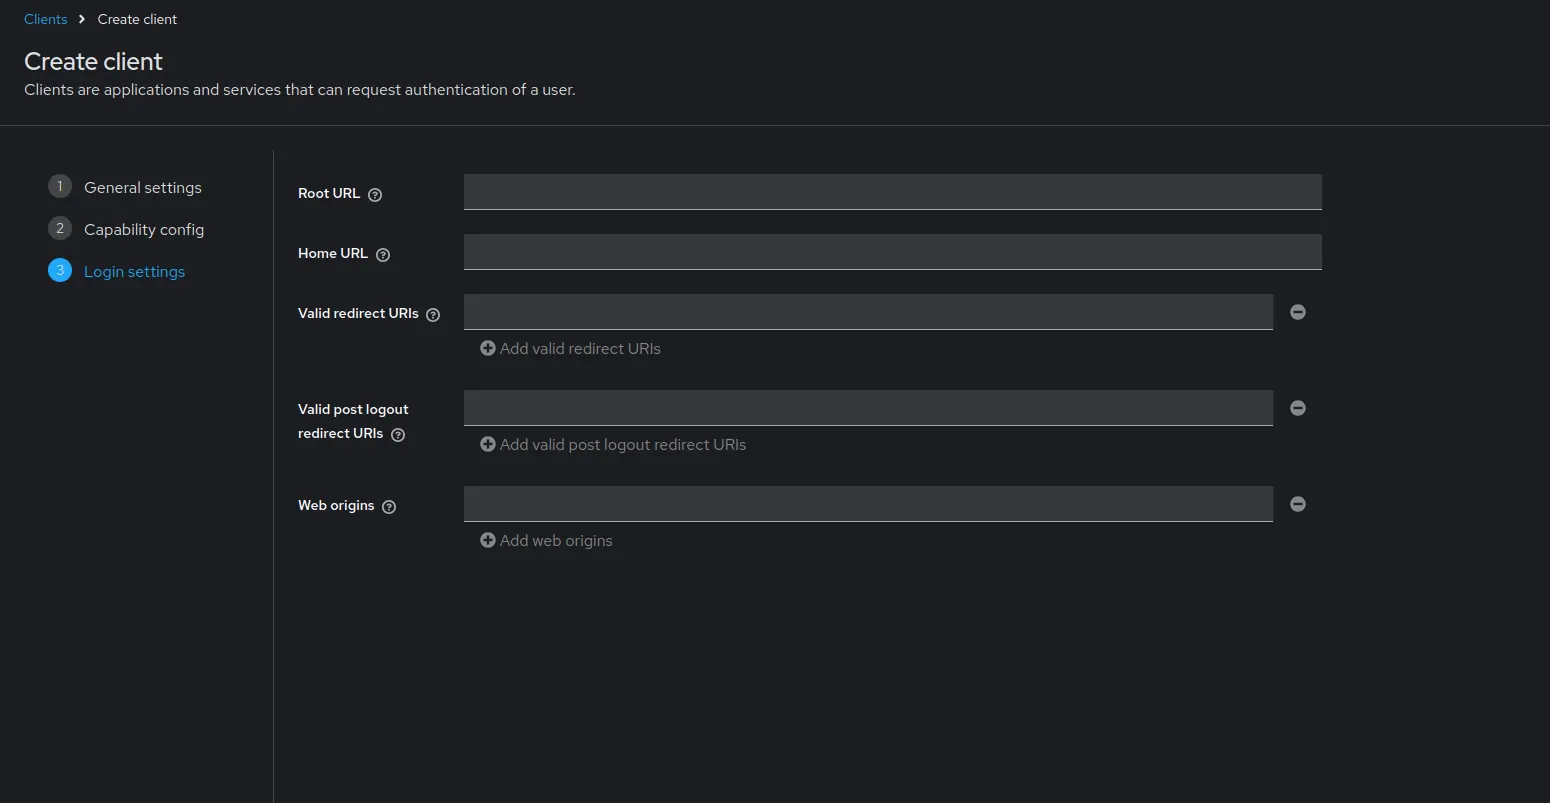
- Click
Save.
- Click
Go to
Clients->vmagent->Credentials.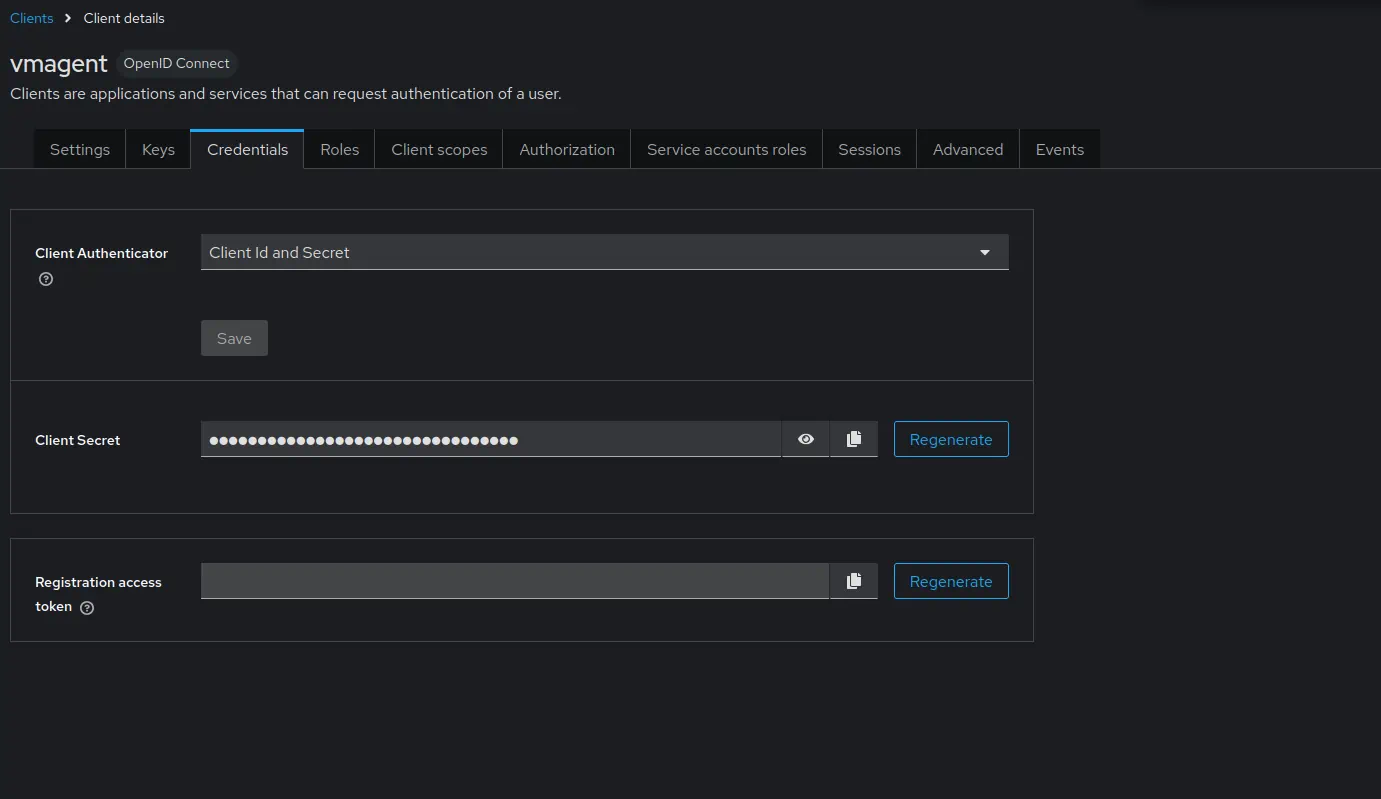
- Copy the value of
Client secret. It will be used later in vmagent configuration.
- Copy the value of
Go to
Clients->vmagent->Client scopes.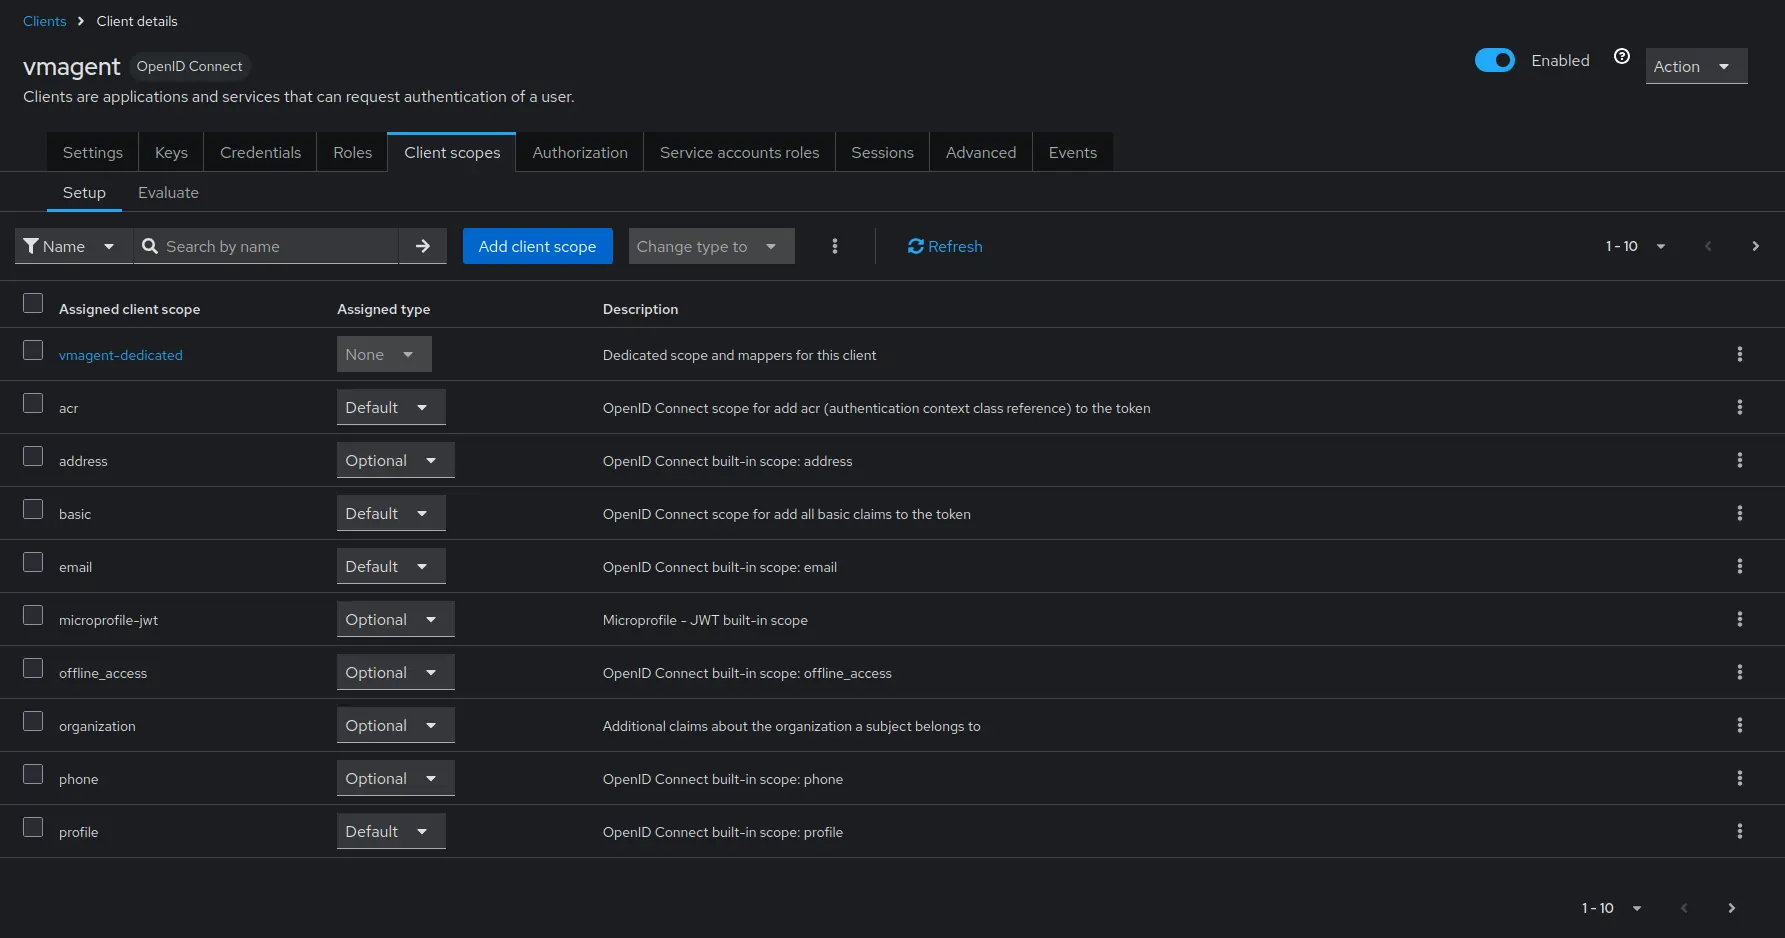
- Click on
vmagent-dedicated->Configure a new mapper->User attribute.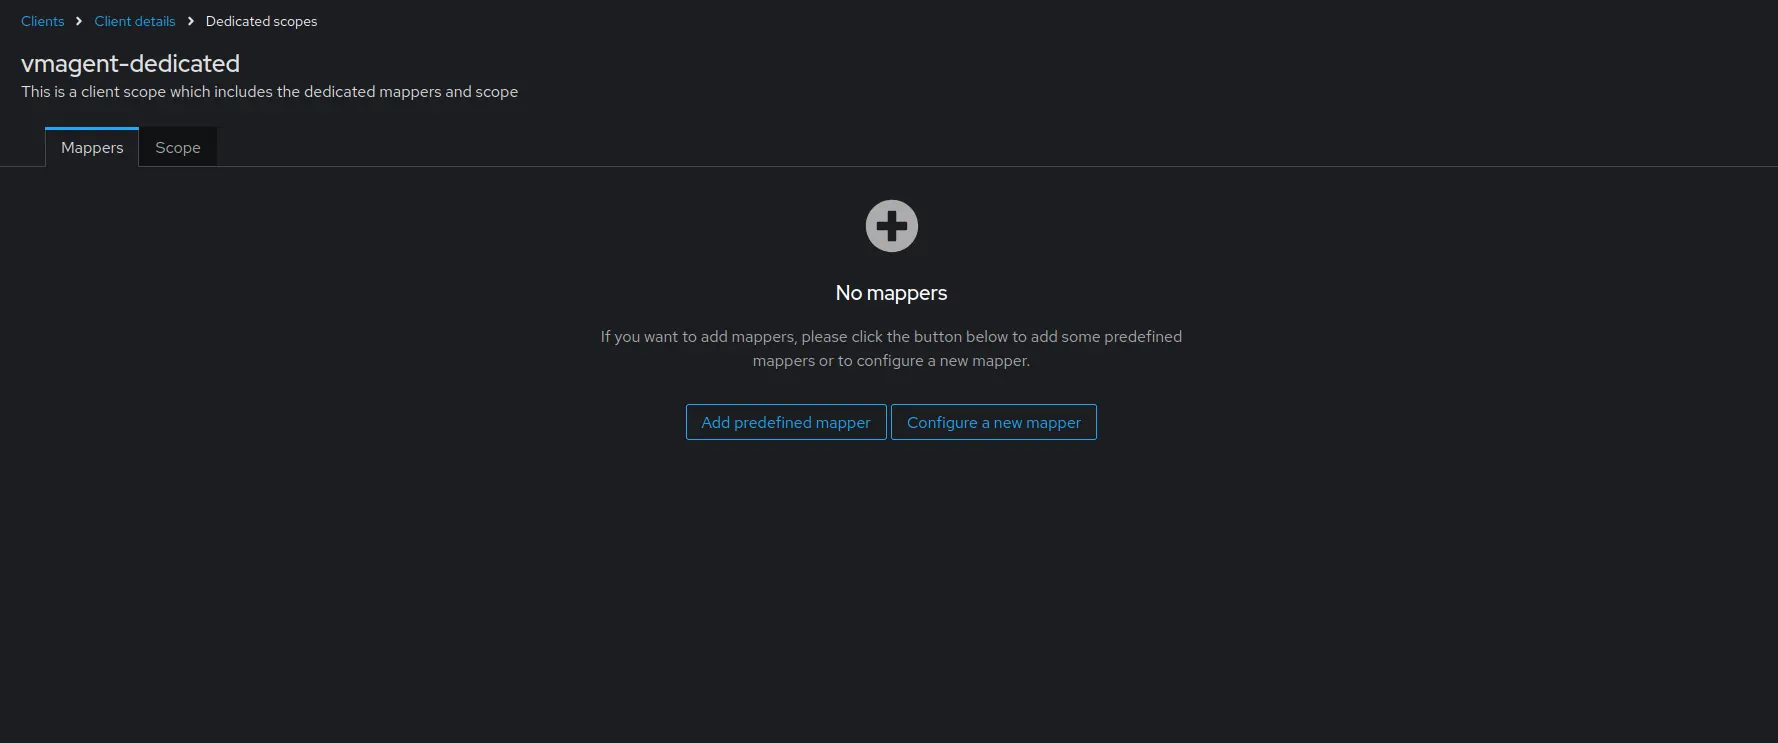
- Click on
Configure the mapper as follows:
Nameasvm_access.User Attributeasvm_access.Token Claim Nameasvm_access.Claim JSON TypeasJSON.- Enable
Add to ID tokenandAdd to access token.
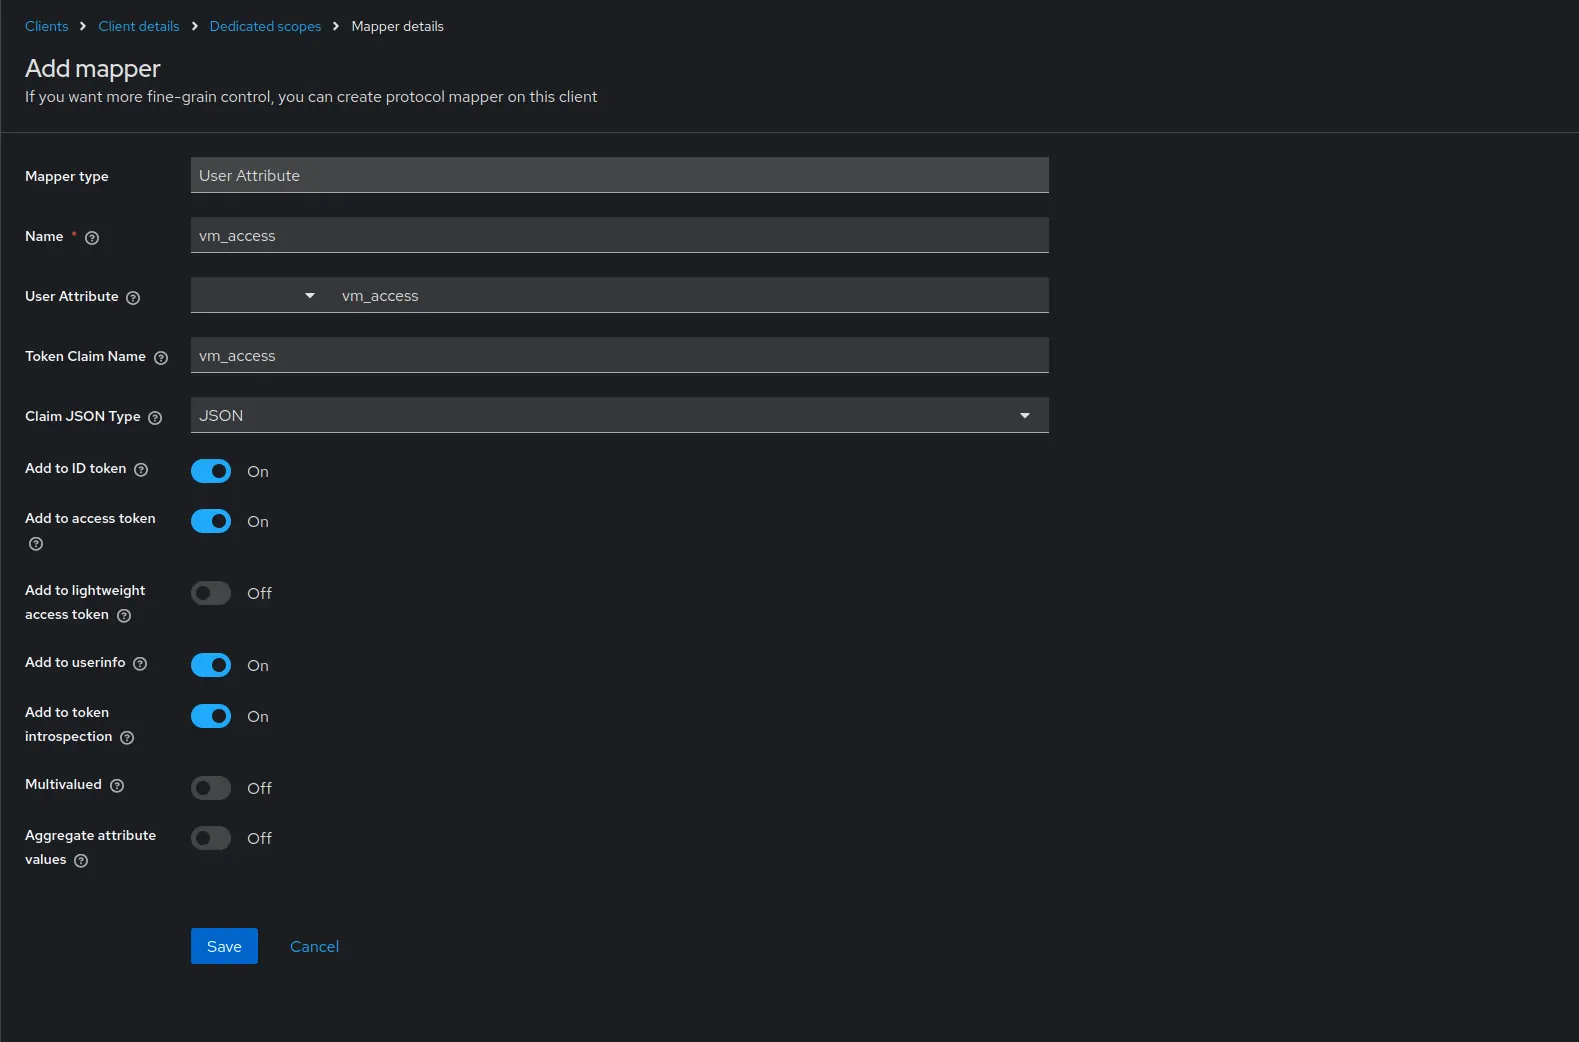
- Click
Save.
Create User Attributes #
- Go to
Realm settings->User profile.- Click
Create attribute. - Specify
vm_accessasAttribute [Name].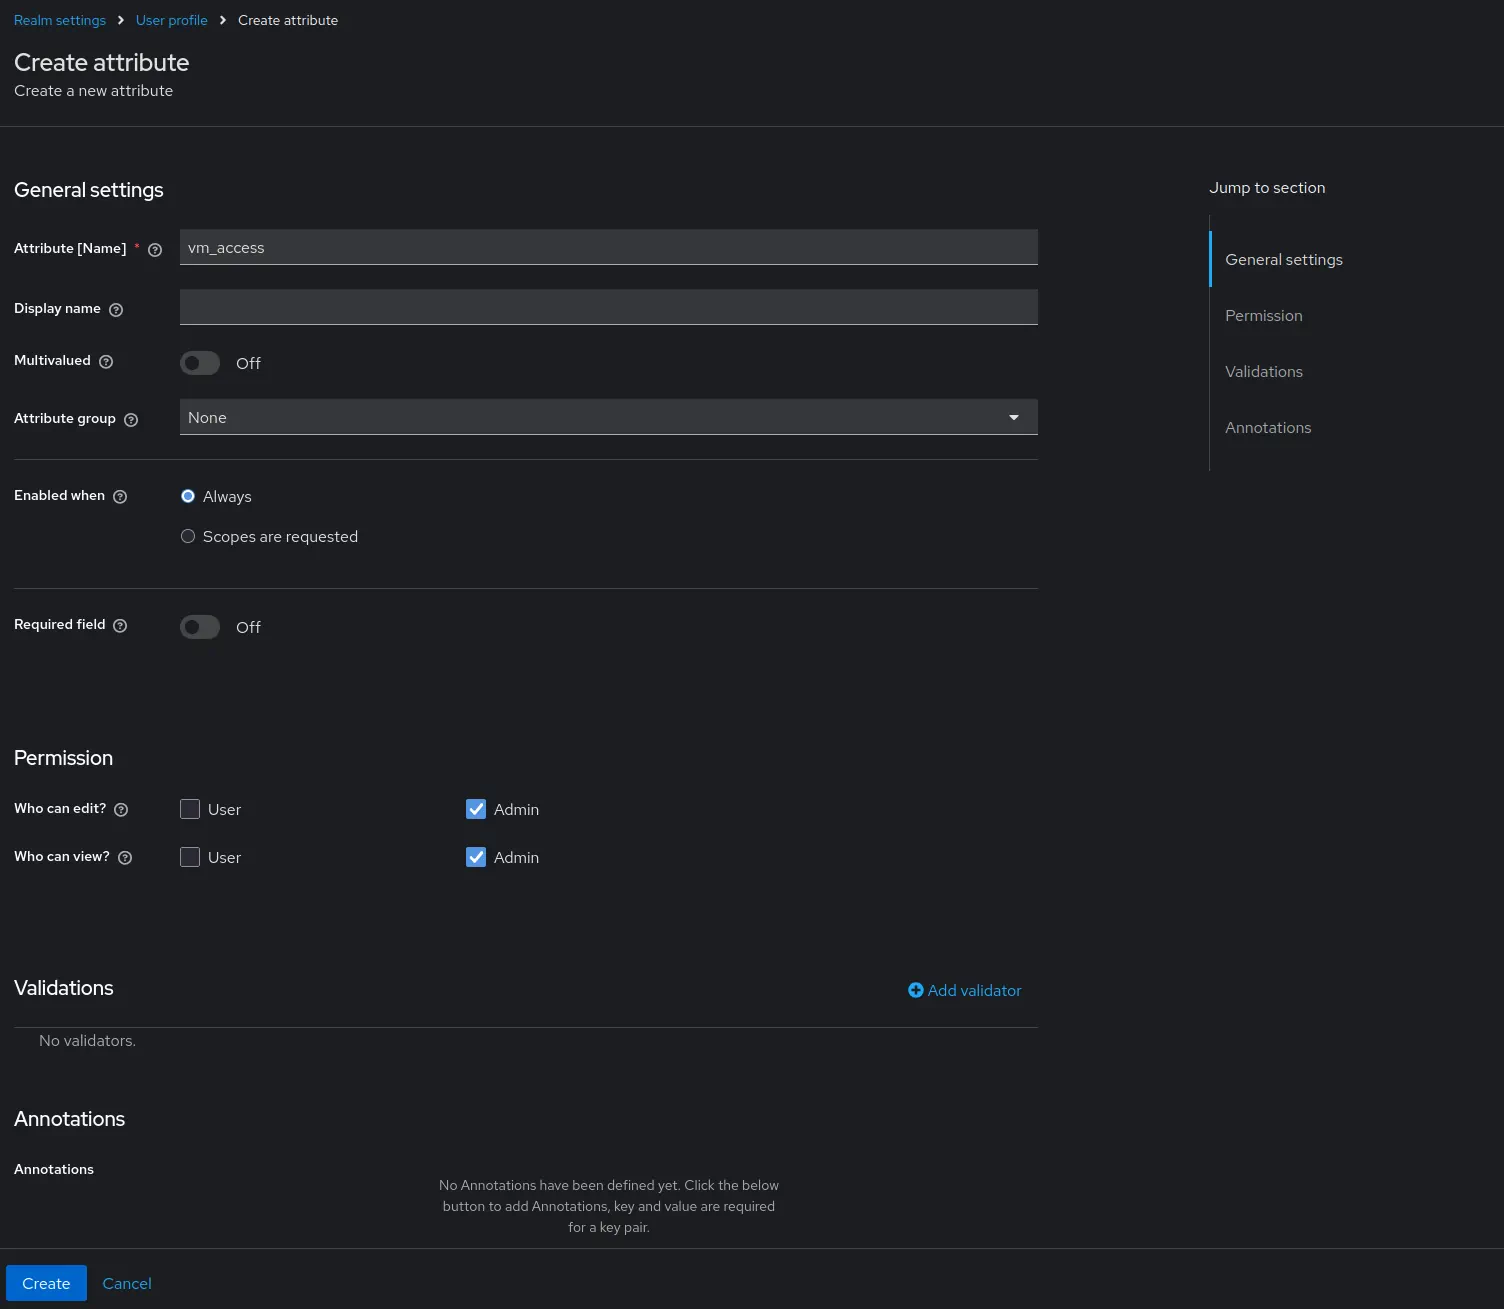
- Click
Create.
- Click
Configure service account #
- Go to
Client->vmagent->Service account roles-> click onservice-account-vmagent.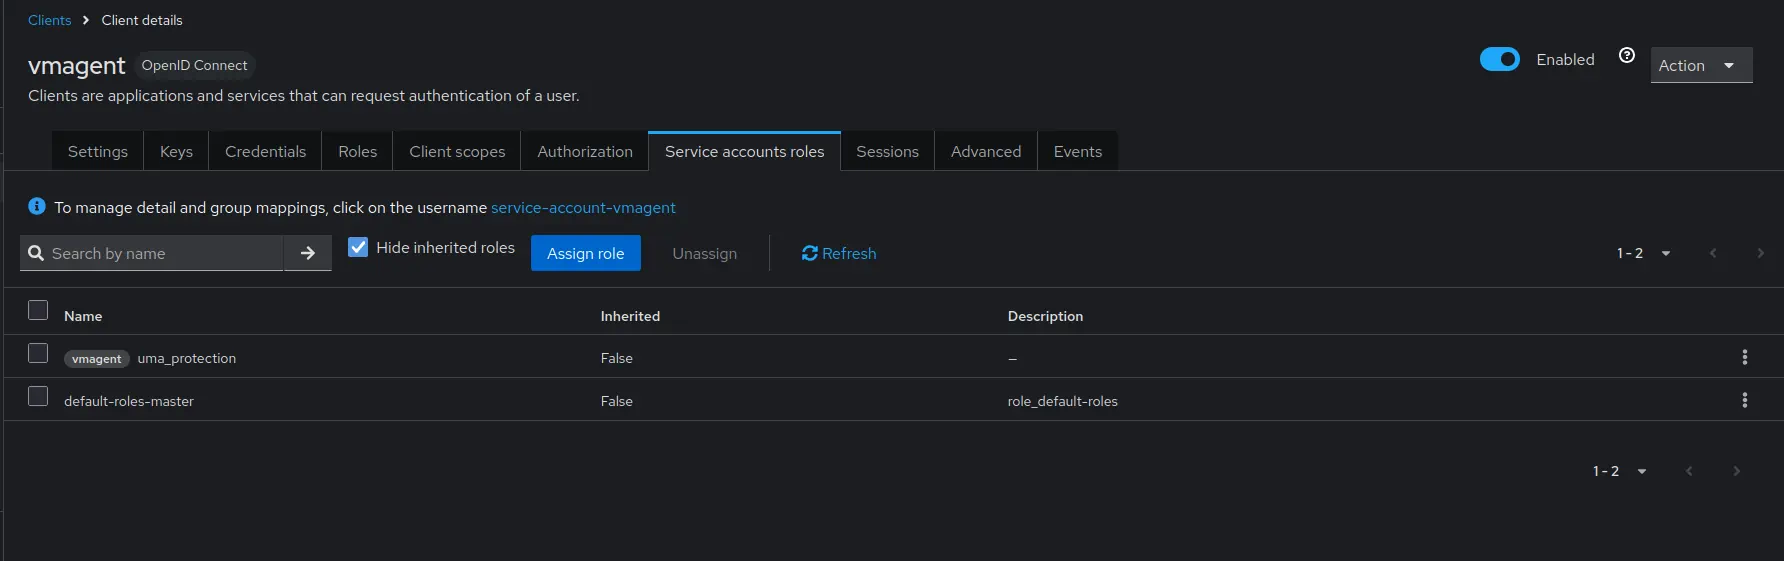
- Set the
vm_accessattribute value to{"metrics_account_id": 0, "metrics_project_id": 0}.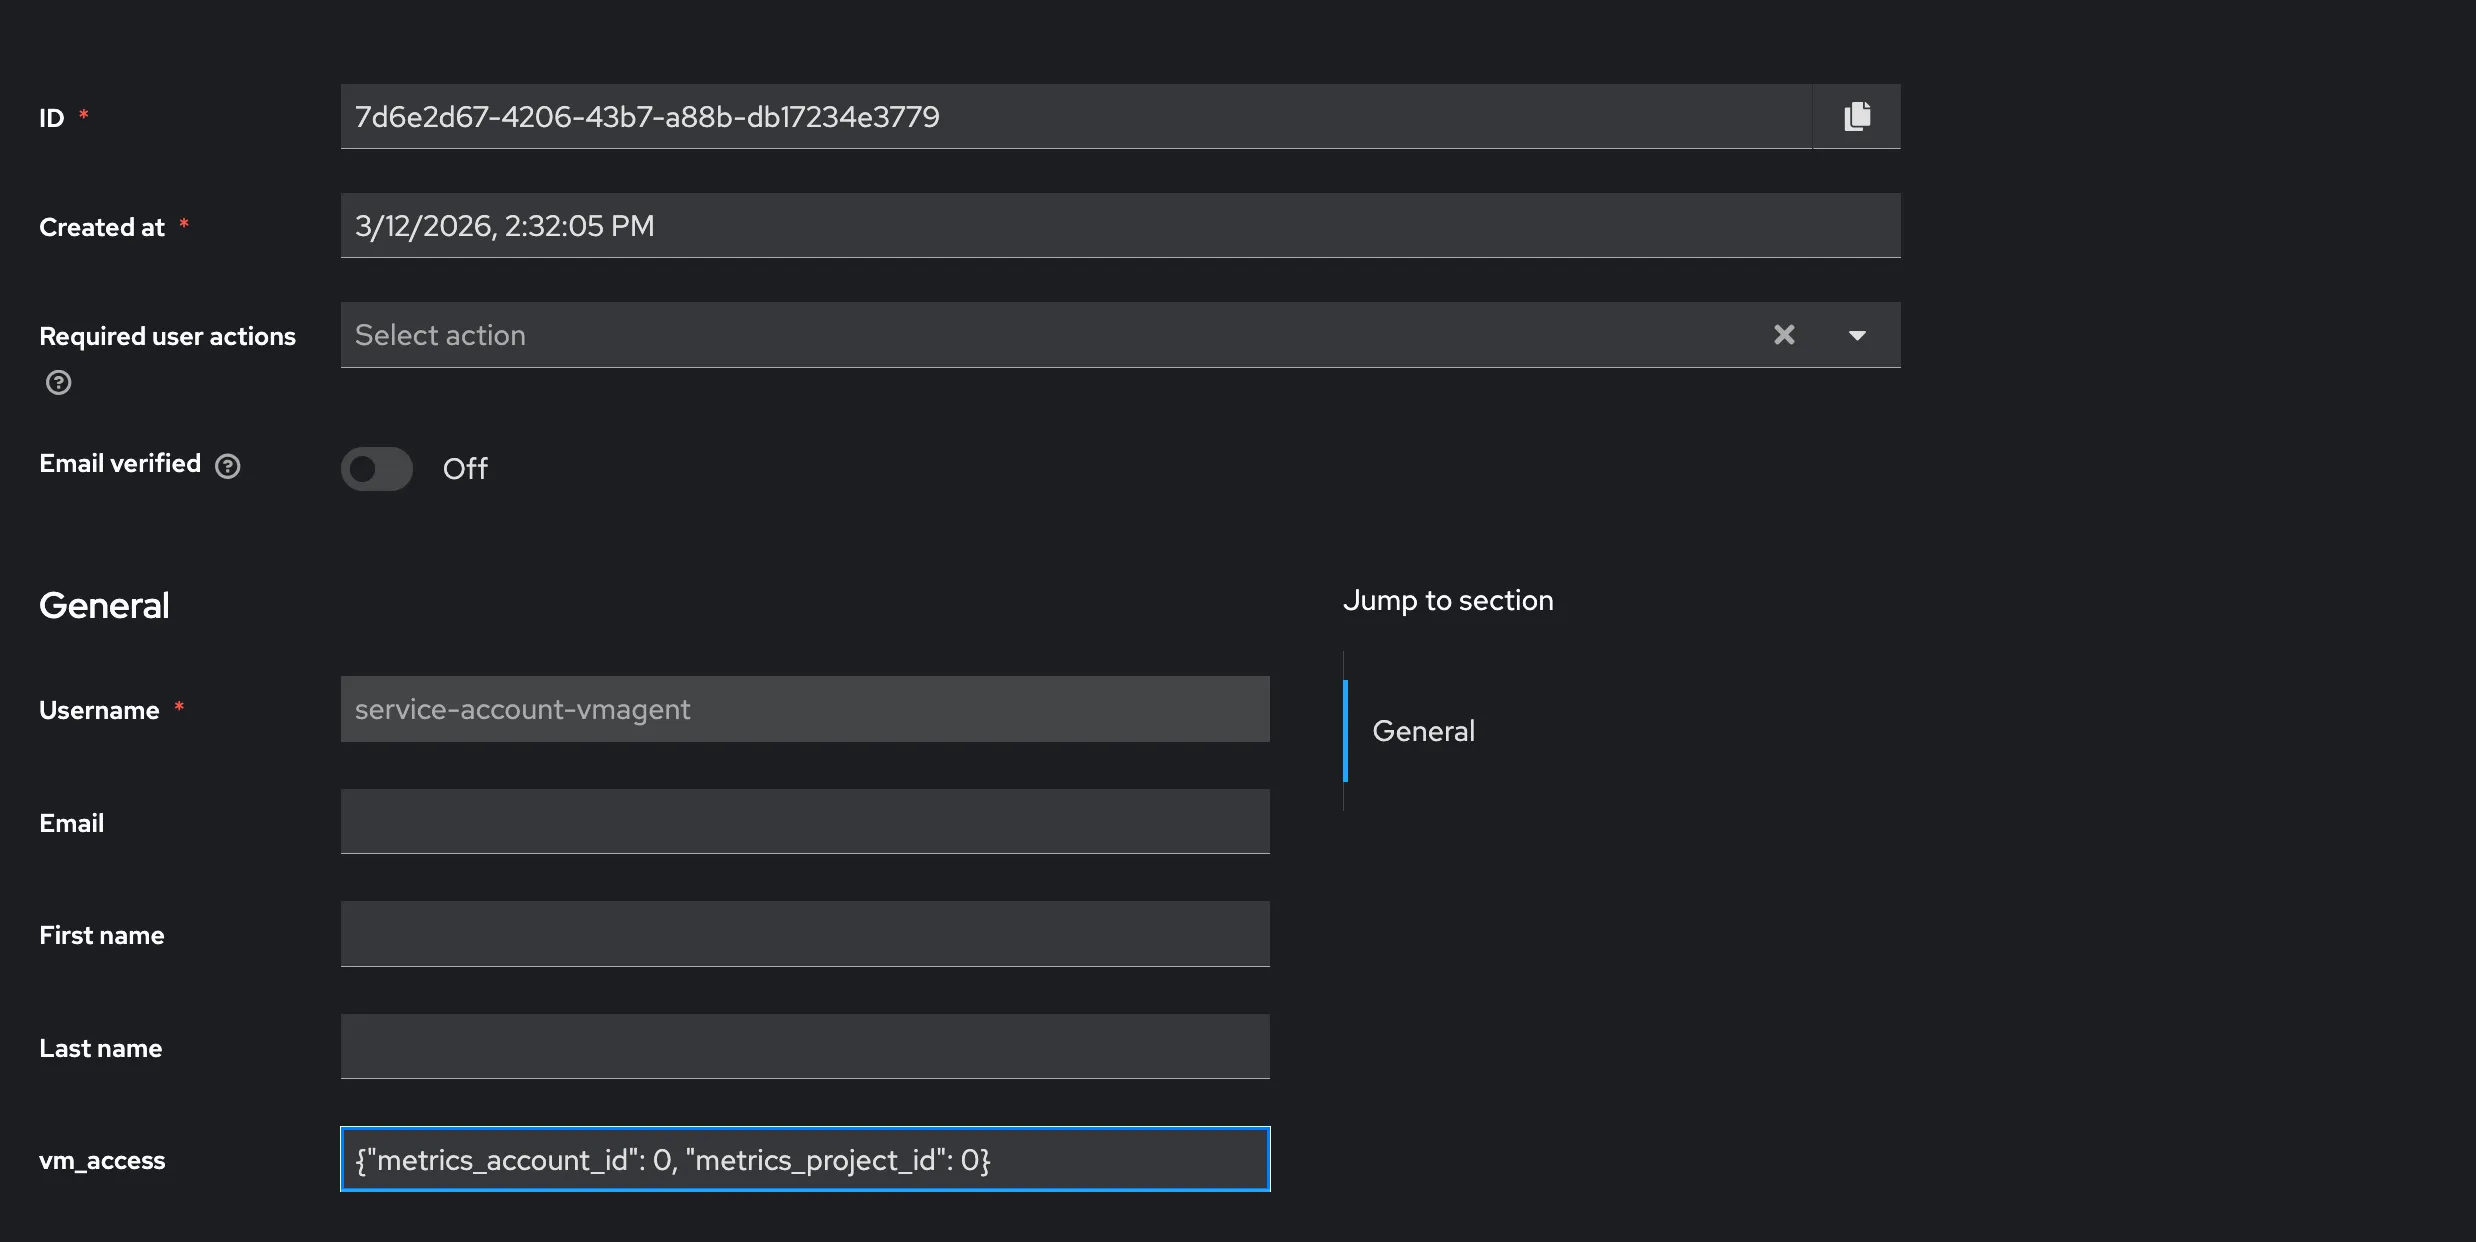
- Click
Save.
- Click
Test identity provider #
Start the service:
docker compose up
Verify the setup by requesting a token with curl:
      TOKEN=$(curl -s -X POST "http://keycloak:3001/realms/master/protocol/openid-connect/token" \
  -H "Content-Type: application/x-www-form-urlencoded" \
  -d "client_id=vmagent" \
  -d "client_secret={CLIENT_SECRET}" \
  -d "grant_type=client_credentials" \
  | jq -r '.access_token') && echo "$TOKEN"
The response should contain a valid JWT token with the vm_access claim.
Use jwt.io
to decode and inspect the token.
VictoriaMetrics #
Setup storage #
Add the VictoriaMetrics cluster components to the compose.yaml file.
These services will store and query the metrics scraped by vmagent.
      # compose.yaml
services:
  vmstorage:
    image: victoriametrics/vmstorage:v1.139.0-cluster

  vminsert:
    image: victoriametrics/vminsert:v1.139.0-cluster
    command:
      - -storageNode=vmstorage:8400

  vmselect:
    image: victoriametrics/vmselect:v1.139.0-cluster
    command:
      - -storageNode=vmstorage:8401
    ports:
      - 8481:8481
Setup vmauth #
Create a vmauth configuration file vm-auth.yaml that enables OIDC authorization using the identity provider.
The {{.MetricsTenant}} is expanded by vmauth into accountID:projectID derived from the vm_access claim, and defaults to 0:0 if not set.
      # vm-auth.yaml

users:
- jwt:
    oidc:
      issuer: 'http://keycloak:3001/realms/master'
  url_map:
    - src_paths:
        - "/insert/.*"
      drop_src_path_prefix_parts: 1
      url_prefix: "http://vminsert:8480/insert/{{.MetricsTenant}}/prometheus/"
Add the vmauth service to compose.yaml:
      # compose.yaml
services:
  vmauth:
    image: victoriametrics/vmauth:v1.139.0-enterprise
    ports:
      - 8427:8427
    volumes:
      - ./vm-auth.yaml:/etc/config.yaml
    command:
      - -auth.config=/etc/config.yaml
Test vmauth #
Start the services:
docker compose up
Use the token obtained in the Test identity provider section to test the vmauth configuration.
      curl http://localhost:8427/insert/api/v1/write -H "Authorization: Bearer ${TOKEN}" -i
# Output
# HTTP/1.1 204 No Content
# ...
Vmagent #
Setup #
First, create a demo scrape.yaml file with basic scrape targets:
      # scrape.yaml
scrape_configs:
  - job_name: stat
    static_configs:
      - targets:
          - vmagent:8429
          - vmauth:8427
Now we’ll configure vmagent to authenticate to vmauth using OAuth2 client credentials flow.
The vmagent service automatically obtains and refreshes JWT tokens from the identity provider and includes them in the Authorization header when sending metrics to vmauth.
This enables secure metric ingestion with proper tenant isolation based on the claims in the JWT token.
We’ll use the vmagent client that was created in the
Create client
section.
The client secret obtained from that step will be used to authenticate vmagent with Keycloak.
Add the vmagent service to compose.yaml with OAuth2 configuration:
      # compose.yaml
services:
  vmagent:
    image: victoriametrics/vmagent:v1.139.0
    volumes:
      - ./scrape.yaml:/etc/vmagent/config.yaml
    command:
      - -promscrape.config=/etc/vmagent/config.yaml
      - -remoteWrite.url=http://vmauth:8427/insert/api/v1/write
      - -remoteWrite.oauth2.clientID=vmagent
      # This flag is used for demo purposes. In production, use -remoteWrite.oauth2.clientSecretFile instead to avoid exposing the secret in the command line/process list
      - -remoteWrite.oauth2.clientSecret={CLIENT_SECRET}
      - -remoteWrite.oauth2.tokenUrl=http://keycloak:3001/realms/master/protocol/openid-connect/token
      - -remoteWrite.oauth2.scopes=openid
Use the client secret obtained in the Create client section.
Test metrics #
Go to http://localhost:8481/select/0/vmui/ and query the vm_app_version metric. If the metric is present, then everything is working as expected.
Summary #
This guide showed how to configure vmagent to ingest metrics into a VictoriaMetrics cluster through vmauth using OIDC authentication. Vmagent uses the OAuth2 client credentials flow to obtain JWT tokens from Keycloak, which vmauth validates and uses to route requests to the correct tenant.