There are two ways to get started with VictoriaMetrics:
- Try it locally - if you just want to see how VictoriaMetrics works, go with the single binary: download it, start it with one command, and see live metrics in the built-in UI in a couple of minutes. No Docker, no configuration files and no extra components are required;
- Install it - if you want to set up VictoriaMetrics for real use, pick a distribution (single-node, cluster or cloud) and an installation method (Docker, Helm, binary releases, etc.).
If you’d rather not install anything at all, try Playgrounds - a list of publicly available playgrounds for VictoriaMetrics software.
Whichever way you choose, you may also find interesting the other sections of this page, like how to write and query data, alerting , data migration from other TSDBs, and productionization best practices for running VictoriaMetrics in production.
Try it locally #
The fastest way to try VictoriaMetrics on your own machine is its binary - the only thing needed to run it.
Step 1: Download the binary #
Create a directory for this test drive, so all the files created along the way stay in one place:
mkdir vm-quick-start && cd vm-quick-start
Download the victoria-metrics-<os>-<arch>-<version>.tar.gz archive for your OS and architecture
from the releases page
and unpack it. It contains a single victoria-metrics-prod binary.
For example, on Linux with amd64 architecture:
      wget https://github.com/VictoriaMetrics/VictoriaMetrics/releases/download/v1.154.1/victoria-metrics-linux-amd64-v1.154.1.tar.gz
tar xzf victoria-metrics-linux-amd64-v1.154.1.tar.gz
The binary is self-contained and requires no installation - it is ready to run as is.
Step 2: Start VictoriaMetrics #
Starting VictoriaMetrics is as simple as executing the binary, with no arguments at all.
But since it is nicer to have some data to explore right after the start, let’s also enable self-scraping
via the -selfScrapeInterval command-line flag, so VictoriaMetrics collects metrics about itself:
./victoria-metrics-prod -selfScrapeInterval=10s
VictoriaMetrics prints a couple of dozen log lines on start, describing the storage, caches and memory limits it sets up. Look for these two lines confirming that it is up and running:
      2026-07-10T16:55:06.615Z    info    app/victoria-metrics/main.go:102    started VictoriaMetrics in 0.019 seconds
...
2026-07-10T16:55:06.615Z    info    lib/httpserver/httpserver.go:148    started server at http://0.0.0.0:8428/
That’s it - VictoriaMetrics is running, listening on port 8428 and scraping its own metrics
(CPU and memory usage, the number of stored metrics, request rates, etc.) every 10 seconds.
If you list the vm-quick-start directory, you can see a new victoria-metrics-data directory
created next to the binary - this is where the collected data is stored.
Now that metrics are being collected, it’s time to look at them.
Step 3: Explore the metrics #
Open http://localhost:8428/vmui in your browser to access vmui - the built-in UI for querying and graphing metrics. You should see its query page:
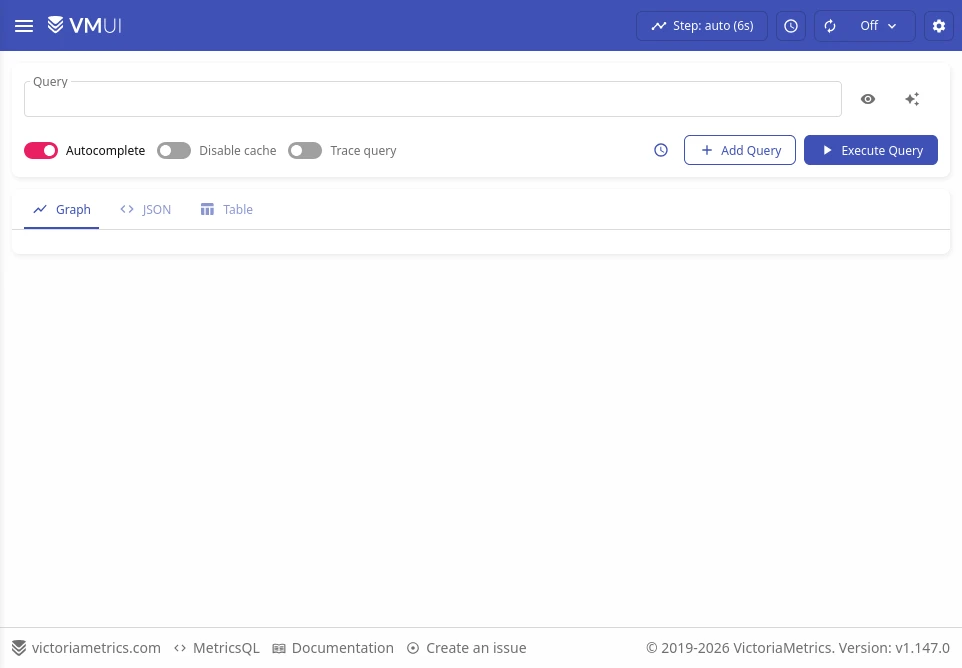
Self-scraped metrics become queryable within ~30 seconds after the start.
Try the following:
- Open the metrics explorer at http://localhost:8428/vmui/#/metrics to browse all collected metrics;
- Enter a query in the input field at http://localhost:8428/vmui
and press
Enter. For example:process_resident_memory_bytes- memory used by VictoriaMetrics;rate(process_cpu_seconds_total)- its CPU usage;vm_rows{type=~"storage/.+"}- the number of stored raw samples .
Queries are written in MetricsQL - a PromQL-compatible query language, so any PromQL query works here as well.
So far the only available metrics are the ones VictoriaMetrics reports about itself - let’s collect something more interesting.
Step 4 (optional): Collect metrics from your system #
Self-scraped metrics only describe VictoriaMetrics itself. To monitor your machine (CPU, memory, disk, network), run node_exporter - the standard Prometheus exporter for host metrics - and let VictoriaMetrics scrape it. Single-node VictoriaMetrics has a built-in Prometheus-compatible scraper , so no other components are needed.
Download the
node_exporter-<version>.<os>-<arch>.tar.gzarchive for your OS and architecture from the releases page and unpack it. For example, on Linux withamd64architecture:wget https://github.com/prometheus/node_exporter/releases/download/v1.12.0/node_exporter-1.12.0.linux-amd64.tar.gz tar xzf node_exporter-1.12.0.linux-amd64.tar.gzUnlike VictoriaMetrics, it unpacks into its own directory. Start it from there:
./node_exporter-1.12.0.linux-amd64/node_exporterIt exposes host metrics at http://localhost:9100/metrics .
Create a
scrape.yamlfile with the following contents:scrape_configs: - job_name: node-exporter scrape_interval: 10s static_configs: - targets: - localhost:9100Stop VictoriaMetrics with
Ctrl+Cand start it again with the-promscrape.configcommand-line flag pointing to this file:./victoria-metrics-prod -selfScrapeInterval=10s -promscrape.config=scrape.yaml
Check http://localhost:8428/targets
- the node-exporter target should have state: up.
The target shows up as state: down until the first scrape happens, which can take some seconds -
just reload the page a bit later.
Now query host metrics in vmui
. For example:
node_memory_MemAvailable_bytes- available memory on your machine;100 - avg(rate(node_cpu_seconds_total{mode="idle"})) * 100- overall CPU usage in percent.
See scrape config examples for more advanced scrape configurations.
Scraping pulls metrics from targets, but it is not the only way to get data in - metrics can also be pushed directly.
Step 5 (optional): Push your own metrics #
VictoriaMetrics also accepts metrics pushed via
many popular protocols
.
For example, insert a measurement using the InfluxDB line protocol with a plain curl command:
curl -d 'room_temperature,room=kitchen value=21.5' http://localhost:8428/write
Then query room_temperature_value in vmui
to see it.
Take into account that freshly ingested data can take up to 30 seconds to show up in query results,
so don’t worry if it doesn’t appear immediately - just retry the query a bit later.
Once you’re done experimenting, tidying everything up takes a single command.
Cleanup #
Stop VictoriaMetrics and node_exporter with Ctrl+C in their respective terminals. All the collected data lives in the victoria-metrics-data directory -
delete it if you want to start from scratch. To remove all traces of this test drive,
delete the whole vm-quick-start directory created at
step 1
.
This test drive only scratches the surface of what VictoriaMetrics can do. Ready for a real setup? Continue with the installation options below, or learn the key concepts of writing and querying data first.
How to install #
VictoriaMetrics is available in the following distributions:
- Single-server-VictoriaMetrics - all-in-one binary that is easy to run and maintain. Single-server-VictoriaMetrics perfectly scales vertically and easily handles millions of metrics;
- VictoriaMetrics Cluster - set of components for building horizontally scalable clusters;
- VictoriaMetrics Cloud - VictoriaMetrics installation in the cloud. Users can pick a suitable installation size and don’t think of typical DevOps tasks such as configuration tuning, monitoring, logs collection, access protection, software updates, backups, etc.
VictoriaMetrics is available as:
- docker images at Docker Hub and Quay
- Helm Charts
- Kubernetes operator
- Binary releases
- Ansible Roles
- Source code . See How to build from sources
- VictoriaMetrics on DigitalOcean
Just download VictoriaMetrics and follow these instructions . See available integrations with other systems like Prometheus or Grafana .
VictoriaMetrics is developed at a fast pace, so it is recommended to periodically check the CHANGELOG and perform regular upgrades .
Starting VictoriaMetrics Single Node or Cluster on VictoriaMetrics Cloud #
- Go to VictoriaMetrics Cloud and sign up (it’s free).
- After signing up, you will be immediately granted $200 of trial credits you can spend on running Single node or Cluster.
- Navigate to the VictoriaMetrics Cloud quick start guide for detailed instructions.
Starting VictoriaMetrics Single Node via Docker #
Download the newest available VictoriaMetrics release from DockerHub or Quay :
      docker pull victoriametrics/victoria-metrics:v1.154.1
docker run -it --rm -v `pwd`/victoria-metrics-data:/victoria-metrics-data -p 8428:8428 \
 victoriametrics/victoria-metrics:v1.154.1 --selfScrapeInterval=5s -storageDataPath=victoria-metrics-data
For Enterprise images, see this link .
You should see:
       started server at http://0.0.0.0:8428/
 partition "2025_03" has been created
Open http://localhost:8428/vmui in WEB browser to see graphical interface
vmui
.
With --selfScrapeInterval=5s VictoriaMetrics scrapes its own metrics, and they should become queryable 30s after start.
Visit http://localhost:8428/vmui/#/metrics to explore available metrics or run an arbitrary query at
http://localhost:8428/vmui (i.e. process_cpu_cores_available).
Other available HTTP endpoints are listed on http://localhost:8428 page.
See how to write or read from VictoriaMetrics.
Starting VictoriaMetrics Cluster via Docker #
Clone VictoriaMetrics repository
and start the docker environment
via make docker-vm-cluster-up command:
      git clone https://github.com/VictoriaMetrics/VictoriaMetrics && cd VictoriaMetrics
make docker-vm-cluster-up
You should see:
       ✔ Container docker-vmstorage-1-1   Started
 ✔ Container docker-vmstorage-2-1   Started
 ✔ Container docker-alertmanager-1  Started
 ✔ Container docker-vminsert-1-1    Started
 ✔ Container docker-vminsert-2-1    Started
 ✔ Container docker-vmselect-1-1    Started
 ✔ Container docker-vmselect-2-1    Started
 ✔ Container docker-vmauth-1        Started
 ✔ Container docker-vmalert-1       Started
 ✔ Container docker-grafana-1       Started
 ✔ Container docker-vmagent-1       Started
The command starts a set of VictoriaMetrics components for metrics collection, storing, alerting and Grafana for user interface. See the description of deployed topology .
Visit Grafana http://localhost:3000/ (admin:admin) or vmui http://localhost:8427/select/0/vmui (foo:bar) to start exploring metrics.
Further customization is possible by editing the compose-vm-cluster.yml file.
See more details about cluster architecture .
Starting VictoriaMetrics Single Node from a Binary #
Download the correct binary for your OS and architecture from GitHub . For Enterprise binaries, see this link .
Extract the archive to /usr/local/bin by running:
sudo tar -xvf <victoriametrics-archive> -C /usr/local/bin
Replace <victoriametrics-archive> with the path to the archive you downloaded in step 1.
- Create a VictoriaMetrics user on the system:
sudo useradd -s /usr/sbin/nologin victoriametrics
- Create a folder for storing VictoriaMetrics data:
sudo mkdir -p /var/lib/victoria-metrics && sudo chown -R victoriametrics:victoriametrics /var/lib/victoria-metrics
- Create a Linux Service by running the following:
      sudo bash -c 'cat <<END >/etc/systemd/system/victoriametrics.service
[Unit]
Description=VictoriaMetrics service
After=network.target

[Service]
Type=simple
User=victoriametrics
Group=victoriametrics
ExecStart=/usr/local/bin/victoria-metrics-prod -storageDataPath=/var/lib/victoria-metrics -selfScrapeInterval=10s
SyslogIdentifier=victoriametrics
Restart=always

PrivateTmp=yes
ProtectHome=yes
NoNewPrivileges=yes

ProtectSystem=full

[Install]
WantedBy=multi-user.target
END'
Extra
command-line flags
can be added to ExecStart line.
If you want to deploy VictoriaMetrics Single Node as a Windows Service, review the running as a Windows service docs .
Please note, victoriametrics service is listening on :8428 for HTTP connections (see -httpListenAddr flag).
- Start and enable the service by running the following command:
sudo systemctl daemon-reload && sudo systemctl enable --now victoriametrics.service
- Check that the service started successfully:
sudo systemctl status victoriametrics.service
- After VictoriaMetrics is in
Runningstate, verify vmui is working by going tohttp://<ip_or_hostname>:8428/vmui.
Starting VictoriaMetrics Cluster from Binaries #
VictoriaMetrics cluster consists of 3 components . It is recommended to run these components in the same private network (for security reasons ), but on separate physical nodes for the best performance.
On all nodes, you will need to do the following:
Download the correct binary for your OS and architecture with
-clustersuffix from GitHub . For Enterprise binaries, see this link .Extract the archive to /usr/local/bin by running:
sudo tar -xvf <victoriametrics-archive> -C /usr/local/bin
Replace <victoriametrics-archive> with the path to the archive you downloaded in step 1
- Create a user account for VictoriaMetrics:
sudo useradd -s /usr/sbin/nologin victoriametrics
See recommendations for installing each type of cluster component below.
Installing vmstorage #
- Create a folder for storing
vmstoragedata:
sudo mkdir -p /var/lib/vmstorage && sudo chown -R victoriametrics:victoriametrics /var/lib/vmstorage
- Create a Linux Service for
vmstorageservice by running the following command:
      sudo bash -c 'cat <<END >/etc/systemd/system/vmstorage.service
[Unit]
Description=VictoriaMetrics vmstorage service
After=network.target

[Service]
Type=simple
User=victoriametrics
Group=victoriametrics
Restart=always
ExecStart=/usr/local/bin/vmstorage-prod -storageDataPath=/var/lib/vmstorage

PrivateTmp=yes
NoNewPrivileges=yes
ProtectSystem=full

[Install]
WantedBy=multi-user.target
END'
Extra
command-line flags
for vmstorage can be added to ExecStart line.
Please note, vmstorage service is listening on :8400 for vminsert connections (see -vminsertAddr flag),
on :8401 for vmselect connections (see --vmselectAddr flag) and on :8482 for HTTP connections (see -httpListenAddr flag).
- Start and Enable
vmstorage:
sudo systemctl daemon-reload && sudo systemctl enable --now vmstorage
- Check that the service started successfully:
sudo systemctl status vmstorage
- After
vmstorageis inRunningstate, confirm the service is healthy by visitinghttp://<ip_or_hostname>:8482/-/healthylink. It should say “VictoriaMetrics is Healthy”.
Installing vminsert #
- Create a Linux Service for
vminsertby running the following command:
      sudo bash -c 'cat <<END >/etc/systemd/system/vminsert.service
[Unit]
Description=VictoriaMetrics vminsert service
After=network.target

[Service]
Type=simple
User=victoriametrics
Group=victoriametrics
Restart=always
ExecStart=/usr/local/bin/vminsert-prod -storageNode=<list of vmstorages>

PrivateTmp=yes
NoNewPrivileges=yes
ProtectSystem=full

[Install]
WantedBy=multi-user.target
END'
Replace <list of vmstorages> with addresses of previously configured vmstorage services.
To specify multiple addresses you can repeat the flag multiple times, or separate addresses with commas
in one flag. See more details in -storageNode flag description in
vminsert flags
.
Please note, vminsert service is listening on :8480 for HTTP connections (see -httpListenAddr flag).
- Start and Enable
vminsert:
sudo systemctl daemon-reload && sudo systemctl enable --now vminsert.service
- Check that the service started successfully:
sudo systemctl status vminsert.service
- After
vminsertis inRunningstate, confirm the service is healthy by visitinghttp://<ip_or_hostname>:8480/-/healthylink. It should say “VictoriaMetrics is Healthy.”
Installing vmselect #
- Create a folder to store temporary cache:
sudo mkdir -p /var/lib/vmselect-cache && sudo chown -R victoriametrics:victoriametrics /var/lib/vmselect-cache
- Add a Linux Service for
vmselectby running
      sudo bash -c 'cat <<END >/etc/systemd/system/vmselect.service
[Unit]
Description=VictoriaMetrics vmselect service
After=network.target

[Service]
Type=simple
User=victoriametrics
Group=victoriametrics
Restart=always
ExecStart=/usr/local/bin/vmselect-prod -storageNode=<list of vmstorages> -cacheDataPath=/var/lib/vmselect-cache

PrivateTmp=yes
NoNewPrivileges=yes

ProtectSystem=full

[Install]
WantedBy=multi-user.target
END'
Replace <list of vmstorages> with addresses of previously configured vmstorage services.
To specify multiple addresses, you can repeat the flag multiple times or separate addresses with commas
in one flag. See more details in -storageNode flag description
vminsert flags
.
Please note, vmselect service is listening on :8481 for HTTP connections (see -httpListenAddr flag).
- Start and Enable
vmselect:
sudo systemctl daemon-reload && sudo systemctl enable --now vmselect.service
- Make sure the
vmselectservice is running:
sudo systemctl status vmselect.service
- After
vmselectis inRunningstate, confirm the service is healthy by visitinghttp://<ip_or_hostname>:8481/select/0/vmuilink. It should open the vmui page.
Write data #
There are two main models in monitoring for data collection: push and pull . Both are used in modern monitoring, and both are supported by VictoriaMetrics.
See more details on key concepts of writing data here . See documentation for configuring metrics collectors and other integrations .
Query data #
VictoriaMetrics has built-in vmui - graphical User Interface for querying and visualizing metrics. MetricsQL - is the query language for executing read queries in VictoriaMetrics. See examples of MetricsQL queries in MetricsQL concepts .
VictoriaMetrics provides an HTTP API for serving read queries. The API is used in various integrations such as Grafana .
See more details on key concepts of querying data and other integrations .
Alerting #
To run periodic conditions checks use vmalert . It allows creating a set of conditions using MetricsQL expressions and sending notifications to Alertmanager when such conditions are met.
See vmalert quick start .
Data migration #
Migrating data from other TSDBs to VictoriaMetrics is as simple as importing data via any of supported formats .
The migration might get easier when using vmctl - VictoriaMetrics command line tool. It supports the following databases for migration to VictoriaMetrics:
- Prometheus using snapshot API ;
- Thanos ;
- Mimir ;
- Promscale ;
- InfluxDB ;
- OpenTSDB ;
- Migrate data between VictoriaMetrics single and cluster versions .
- Migrate data via Prometheus Remote Read protocol .
Productionization #
When moving to production with VictoriaMetrics, we recommend following these best practices.
Monitoring #
Each VictoriaMetrics component emits its own metrics with various details regarding performance
and health state. Docs for the components also contain a Monitoring section with an explanation
of what and how should be monitored. For example,
Single-server-VictoriaMetrics Monitoring
.
VictoriaMetrics has a list of Grafana dashboards . Each dashboard contains a lot of useful information and tips. It is recommended to have these dashboards installed and up to date.
Using the recommended alerting rules will help to identify unwanted issues.
The rule of thumb is to have a separate installation of VictoriaMetrics or any other monitoring system to monitor the production installation of VictoriaMetrics. This would make monitoring independent and help identify problems with the main monitoring installation.
See more details in the article VictoriaMetrics Monitoring .
Retention #
VictoriaMetrics Single-node and vmstorage in VictoriaMetrics Cluster retain data for 1 month by default.
Data older than the retention period will be automatically deleted. To change the retention period, use the -retentionPeriod flag (e.g. -retentionPeriod=90d).
See the
retention
documentation for more details.
If free disk space falls below -storage.minFreeDiskSpaceBytes, VictoriaMetrics Single-node or vmstorage switches to read-only mode and stops accepting new data. To prevent this, ensure proper
capacity planning
and set up monitoring and alerting for disk usage.
Capacity planning #
See capacity planning sections in docs for Single-server-VictoriaMetrics and VictoriaMetrics Cluster .
Capacity planning isn’t possible without monitoring , so consider configuring it first. Understanding resource usage and performance of VictoriaMetrics also requires knowing the tech terms active series , churn rate , cardinality , slow inserts . All of them are present in Grafana dashboards .
Data safety #
It is recommended to read Replication and data safety , Why replication doesn’t save from disaster?
For backup configuration, please refer to vmbackup documentation .
Graceful shutdown #
To gracefully shut down a VictoriaMetrics process, send SIGTERM or SIGINT signal and wait until the process exits. See how to send signals to processes .
Graceful shutdown is required for data safety. A successful graceful shutdown guarantees that pending in-memory data and
ongoing writes are flushed on disk before the process exits. During graceful shutdown, VictoriaMetrics stops accepting
new HTTP connections and waits for in-flight requests to finish until -http.maxGracefulShutdownDuration expires.
Configuring limits #
To avoid excessive resource usage or performance degradation, limits must be in place: