Congratulations! You are just a few clicks away from running your favorite monitoring stack without needing to worry about its maintenance, proper configuration, access protection, software updates or backups. We take care of that so you can focus on what matters.

The process is very simple: once you are done with registration , you’ll be all set to create a deployment and start writing and reading data right away.
Once the trial period ends, adding a payment method will let you continue using VictoriaMetrics Cloud.
Registration #
Start your registration process by visiting the Sign Up page. VictoriaMetrics Cloud supports registration via Sign up with Google Auth service or Email and password.
How to restore your password
If you forgot your password, it can always be restored by clicking the Forgot password? link on the Sign In
page.
If you need assistance or have any questions, don’t hesitate to contact our support team at support-cloud@victoriametrics.com
.
Creating deployments #
Creating VictoriaMetrics Cloud deployments is straightforward. Simply navigate
to the Deployments
page,
click on Create, pick a
Capacity Tier
,
and your VictoriaMetrics or VictoriaLogs instance will be up & running in a few seconds.
To create your first deployment, click on Start using VictoriaMetrics Cloud.
Customize your deployment #
When creating a deployment, the following options are available:
| Option | Description |
|---|---|
Deployment type | Allows you to choose between VictoriaMetrics and VictoriaLogs deployments. |
Deployment name | A unique name for your deployment that will help you identify it. |
Single-node | For affordable, performant deployments. |
Cluster | For highly available and multi-tenant deployments at scale. |
Region | The cloud provider region where your deployment runs. For optimal performance and reduced traffic costs, select a region close to your application. |
Capacity Tier | VictoriaMetrics Cloud offers a predefined set of instance sizes (or tiers ) that cover most use cases. In this way, we can keep fixed pricing without surprises. Read this guide to understand your setup size. Keep in mind that deployments may be modified ! |
Retention | The time, in months or days, you want to keep your data. Once set, VictoriaMetrics Cloud recommends an estimated storage size for metrics instances. See this note for more information. |
Storage | Disk size for data storage. You always can expand disk size later. See this note for more information. |
Deduplication | Deduplication handles redundant data in high-availability (HA) setups to retain only one sample per interval. For best results, set deduplication to match the collect metrics interval. If you have multiple intervals, set it to the shortest one. |
Maintenance Window | We use this value as the preferred window for us to perform maintenance operations, such as upgrades, when needed. |

After selecting your desired configuration, you are set to Create your deployment. Once created, it will remain for a few seconds in Provisioning status while spinning-up.
You’ll also be notified via email once your deployment is ready to use.
Expand to learn more about retention and storage considerations for VictoriaMetrics instances
Feel free to adjust your deployment based on these recommendations.
About storage in VictoriaMetrics instances #
- Data point sizes are approximated to 0.8 bytes, based on our own experience managing VictoriaMetrics Cloud. This magnitude is increases with cardinality. For high cardinality data, more storage is expected.
- Long time retention: for 6 months or more retention times, we recommend to start with a smaller storage size and increase it over time.
- Storage size can be increased, however, you cannot reduce it due to AWS limitations.
- Enterprise features like downsampling and retention filters may dramatically help to optimize disk space.
- The formula we use for calculating the recommended storage can be found here .
VictoriaLogs instances does not provide storage capacity recommendations at the moment.
Start writing and reading data #
After the transition from Provisioning to Running state, the VictoriaMetrics Cloud deployment
is fully operational and ready to accept write and read requests. Writing and reading data in VictoriaMetrics Cloud is very simple.
Many integrations are supported. Comprehensive examples and guides may be found in the integrations
section.
To read or write data into VictoriaMetrics Cloud, you just need to point your application to your deployment’s Access endpoint and authorize with an Access token.
In brief, you will only need to perform 2 steps:
- Obtain the
Access endpointfor your deployment, which can be found in the Deployments overview. Typically, it looks like:https://<xxxx>.cloud.victoriametrics.com. - Create or reuse an
Access tokento allow any application to read or write data into VictoriaMetrics Cloud. Just pick aName, select read and/or writePermissionandGenerateit. For every deployment, you canGenerate tokensin theAccess tokenstab.
Expand to discover examples for vmagent, Prometheus, Grafana or any other software
Examples for Reading and Writing data into VictoriaMetrics Cloud #
Apart from the mentioned integrations
section,
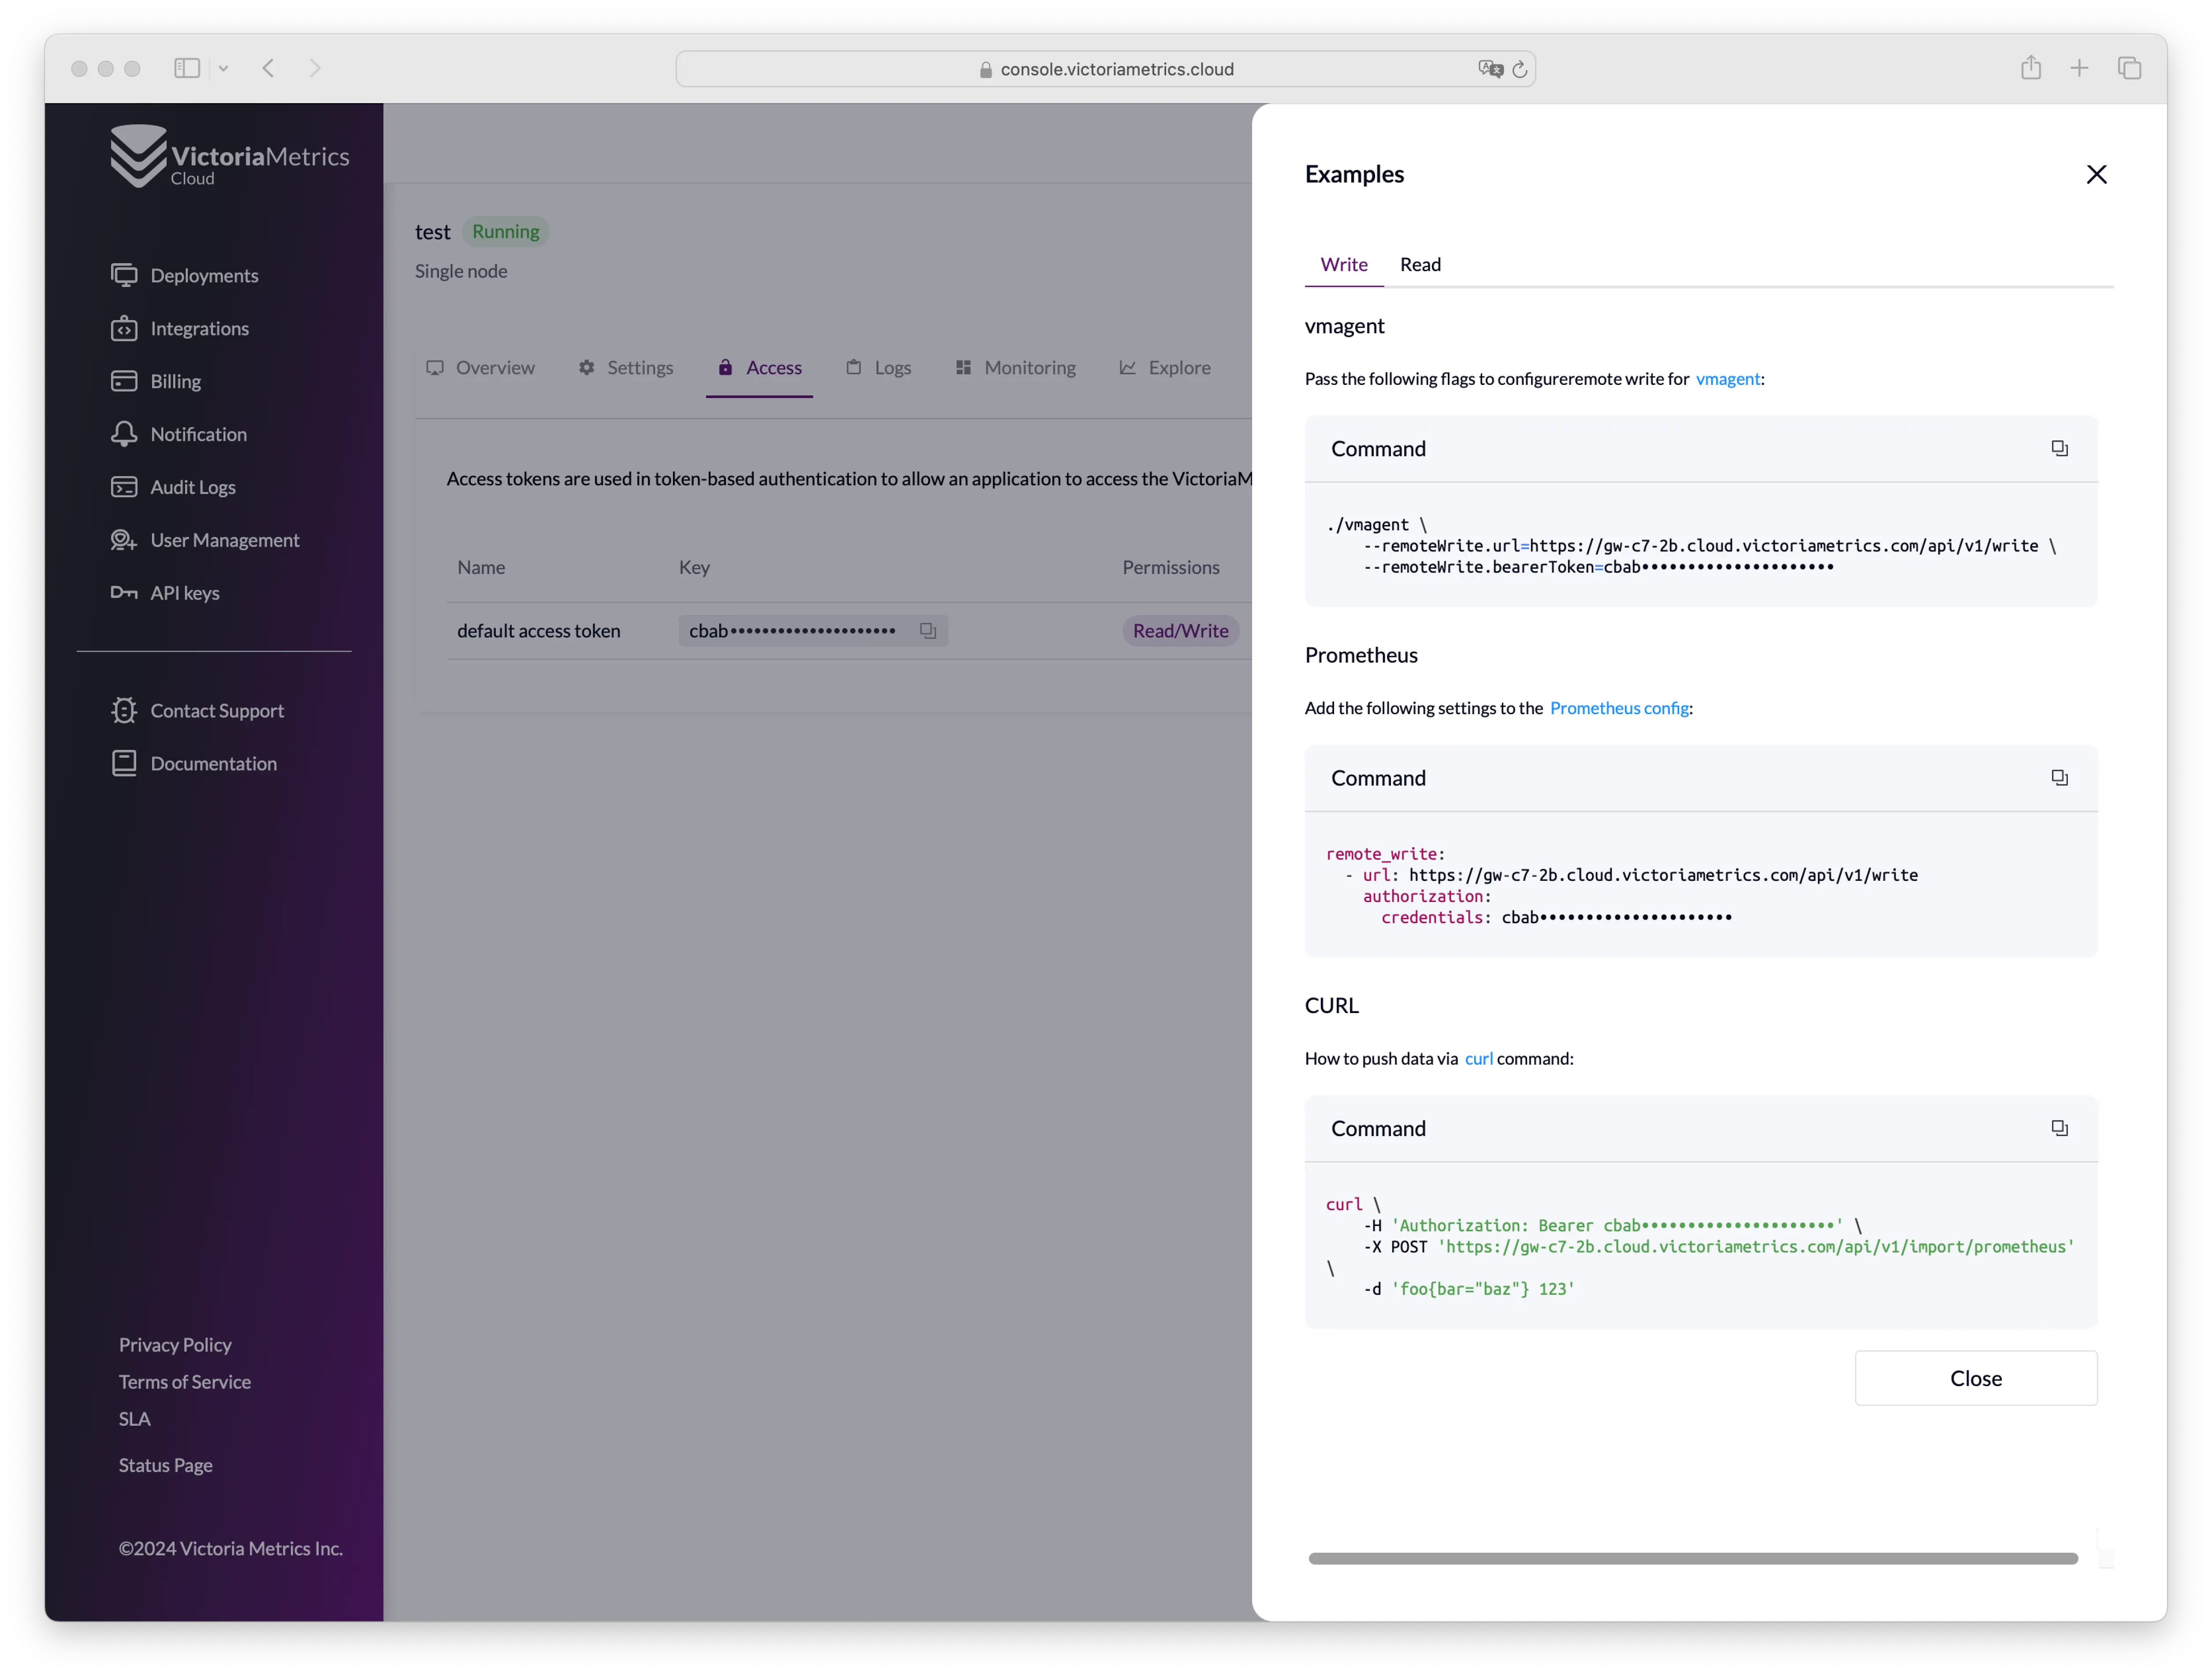
you can always check for quick and easy Copy-paste examples by clicking on the three dots of the desired
Access Token
and select Show examples.
It will provide snippets like:
vmagent #
      ./vmagent \
    --remoteWrite.url=https://<your_access_point>.cloud.victoriametrics.com/api/v1/write \
    --remoteWrite.bearerToken=********
Prometheus Configuration #
      remote_write:
  - url: https://<your_access_point>.cloud-test.victoriametrics.com/api/v1/write
    authorization:
      credentials: ********
Grafana #
Datasource url: https://<your_access_point>.cloud.victoriametrics.comCustom HTTP Header: AuthorizationHeader value: **********
Modifying an existing deployment #
Remember that you can always add, remove or modify existing deployments by changing their configuration on the deployment’s page.
It is important to know that downgrade for clusters is currently not available.
Additional configuration options may be found under Advanced Settings where the following additional parameters can be set:
Deduplicationdefines the interval when a deployment leaves a single raw sample with the biggest timestamp per each discrete interval;Maintenance Windowwhen a deployment should start scheduled upgrade processes;Settingsto define deployment flags, depending on your deployment type: VictoriaMetrics Cluster , VictoriaMetrics Single-node or VictoriaLogs .
These updates require a deployment restart and may result in a short downtime for single-node deployments.
Adding a payment method #
VictoriaMetrics Cloud supports different payment options. You can found more information under the Billing section.
To add your payment method, navigate to the VictoriaMetrics Cloud Billing
page, and go to the Payment methods tab. There, you’ll be able to add a payment method by:
- Bank card: fill required fields
- AWS Marketplace: link your AWS billing account via AWS Marketplace. This option will redirect you to the AWS VictoriaMetrics Cloud product page
, where you can easily
Subscribeto VictoriaMetrics Cloud. You’ll be redirected back to VictoriaMetrics Cloud Billing page by clicking onSet up your account.
If you add both payment methods, you can easily switch between them by selecting your preferred option.
After the trial period expires, deployments will be stopped and deleted if no payment methods are found for your account. If you need assistance or have any questions, don’t hesitate to contact our support team at support-cloud@victoriametrics.com .